

.NET Tools
Essential productivity kit for .NET and game developers
A Guide To Migrating From ASP.NET MVC to Razor Pages

The Model-View-Controller (MVC) pattern is inarguably a successful approach to building web applications. The design gained popularity in many tech communities, implemented in frameworks like Ruby on Rails, Django, and Spring. Since April 2, 2009, Microsoft has offered developers the ability to create MVC pattern web applications with the release of ASP.NET MVC. The approach leans heavily on the ideas of convention over configuration, and with conventions come ceremony. The ceremony can come with an overhead not necessary for less complicated apps.
With the release of .NET Core 2.0, ASP.NET developers were introduced to Razor Pages, a new approach to building web applications. While it can be reminiscent of WebForms, the framework learns from the decade of experience building web frameworks. The thoughtfulness put into Razor Pages shows with its ability to leverage many of the same features found in ASP.NET MVC.
In this post, we’ll explore an existing ASP.NET MVC application, begin to migrate it to Razor Pages, and see where Razor Pages may not be a good fit.
Why Razor Pages
Razor Pages embraces the traditional web, accepting the constraints of an HTML form and the everyday use cases that come with building line-of-business applications. That’s not to say that those constraints limit what we can do with Razor Pages. On the contrary, in most cases, Razor Pages can do all the things an ASP.NET MVC application can.
Razor Pages works on top of ASP.NET Core and has many of the same features found in ASP.NET MVC: Routing, Model Binding, ModelState, Validation, Razor views, and ActionResult return types. We see the most significant differences in the supported HTTP semantics of Razor Pages.
While ASP.NET MVC supports the full array of HTTP methods (GET, POST, DELETE, etc.), Razor Pages only supports a limited set: GET, POST, and PUT.
Traditionally, ASP.NET MVC and WebAPI support HTTP-based APIs, and ASP.NET Core’s iteration on MVC has emphasized the pattern as a way to build APIs for single-page applications. The constraint is no accident, as these are the same methods supported in HTML’s form tag.
As we’ll see later in this post, ASP.NET MVC separates its three main components: Model, View, and Controller. Razor Pages takes a different approach entirely, collapsing all three elements into what is effectively one project element. Razor Pages uses a PageModel to describe the behaviors and state of each endpoint. Fewer project assets can reduce the cognitive overhead and context-switching between model, view, and controller folders. Less code for the same amount of value is always a benefit.
To follow along, the solution used in this blog post can be found on GitHub. We’ll be comparing the two structures of ASP.NET MVC and Razor Pages. In doing so, we’ll see the differences and similarities between the MVC and Page approach.
ASP.NET MVC Structure
As stated previously, the MVC pattern has three main parts. Let’s looks at our sample project and take note of the MVC elements in the solution explorer.
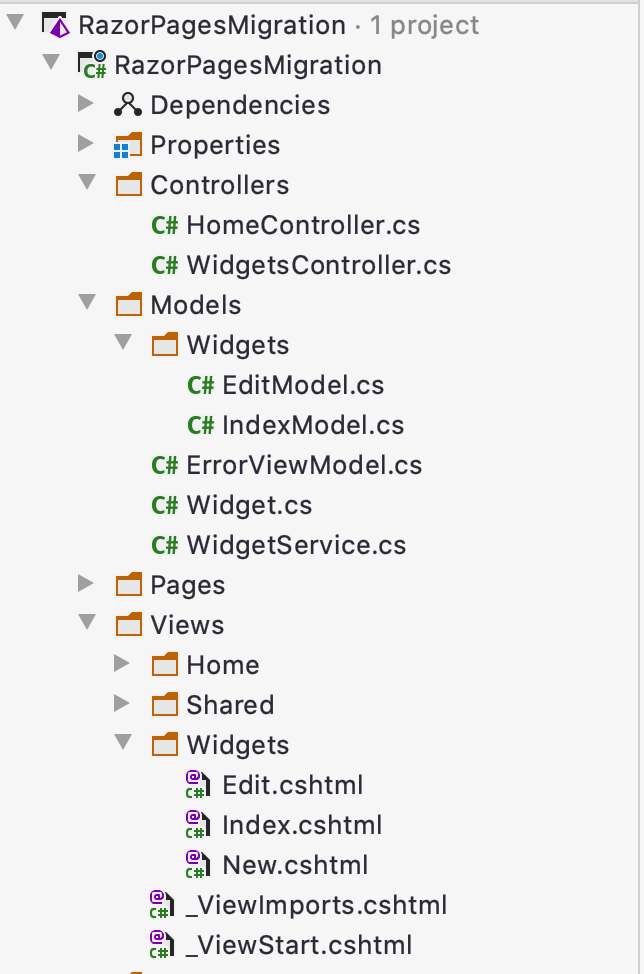
We have the following elements:
- Controllers
- Models/ViewModels
- Views
As a good practice, we want to use ViewModels for our mutation-based endpoints. Let’s break down one action in our WidgetsController to see all the elements come together.
[HttpPost, Route("create")]
public IActionResult Create([FromForm] EditModel request)
{
    if (ModelState.IsValid)
    {
        // widget service
        service.Add(request.Name);
        return RedirectToAction("Index");
    }

    return View("New", request);
}
The first things we should notice are the attributes of HttpPost and Route. The attributes help ASP.NET MVC route an HTTP request to our controller action. We also utilize a request model to bind the values from the request’s form to our C# instance. Next, we determine the validity of our HTTP request using ModelState. From there, we either save the value or return the New view. Within this one action, we checked all the major components of the MVC pattern.
To create the sample used in this post, we need to create an additional five actions, for a total of six endpoints. All endpoints have similar approaches. The resulting implementation can be seen in the solution explorer, or by running the project found on GitHub.
Razor Pages Structure
The main benefit of Razor Pages is the collapsed programming model. We can see that by looking at the Razor Pages folders in the solution explorer. Excluding our domain models, which contain our services, we are down to one folder.

Let’s migrate the Create MVC action from the previous section to the Razor Pages philosophy.
public class Create : PageModel
{
    [BindProperty, Required]
    public string Name { get; set; }

    // public void OnGet() { }

    public IActionResult OnPost([FromServices]WidgetService service)
    {
        if (ModelState.IsValid)
        {
            var widget = service.Add(Name);
            return RedirectToPage("Index");
        }

        return Page();
    }
}
Let’s walk through the most significant changes in Razor Pages, as it may not be immediately clear what has happened.
- The routing of our page is conventional. It uses the content path of our page to build the route.
- The GET method is implicit since the Razor Page handles both GET and POST requests. We do not need it in our
PageModel, because we have no logic on GET requests. - The
Createclass is the ViewModel. We bind theNameproperty on each POST request. We don’t need any other objects. - We are using
ModelStatefor validation, just like MVC. - We are using
IActionResultto route our client, just like MVC.
We should also take notice that our views and page models are linked together within the same folder. Looking at our view, we can see how we reference the “Create” PageModel.
@page
@model RazorPagesMigration.Pages.Widgets.Create
<h2>Create</h2>
<form method="post" asp-page="Create">
    <label asp-for="Name"></label>
    <input asp-for="Name" />
    <span asp-validation-for="Name"></span>
    <button type="submit">Save Widget</button>
</form>
If we were to look at our MVC view implementation, we’d notice the two are almost identical except for the references to the asp-page attributes on the HTML form.
We can see a more advanced example of a Razor Page implementation in our Edit page.
public class Edit : PageModel
{
    private readonly WidgetService service;

    public Edit(WidgetService service)
    {
        this.service = service;
    }

    [BindProperty(SupportsGet = true)]
    public int Id { get; set; }

    [BindProperty, Required]
    public string Name { get; set; }

    public IActionResult OnGet()
    {
        var widget = service.Get(Id);

        if (widget == null)
            return NotFound();

        Name = widget.Name;

        return Page();
    }

    public IActionResult OnPost()
    {
        if (ModelState.IsValid)
        {
            service.Update(Id, Name);
            return RedirectToPage("Index");
        }

        return Page();
    }
}
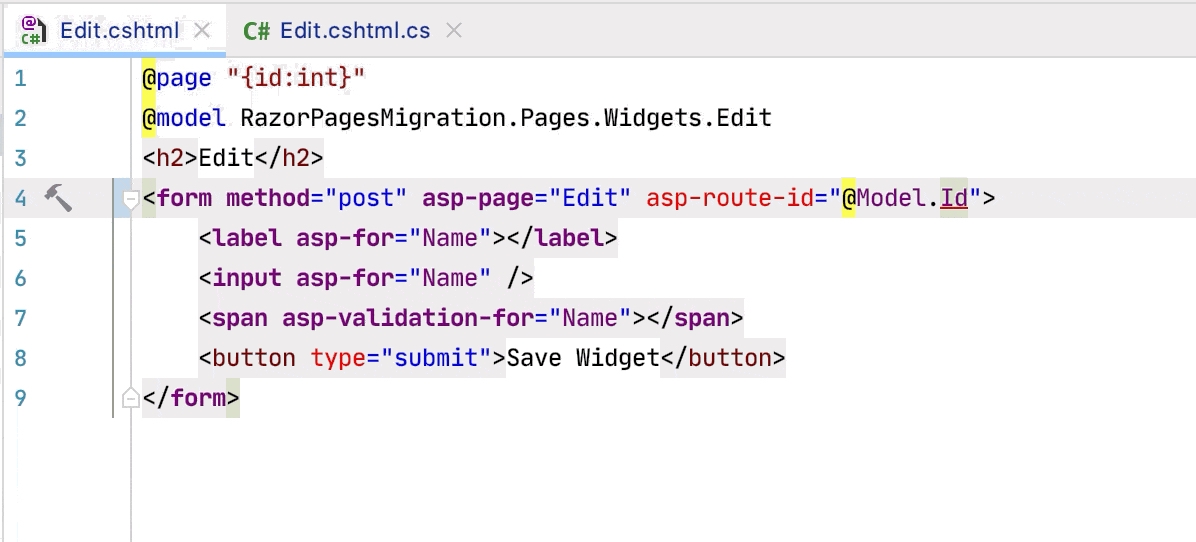
As we can see, it is very similar to the Create page, but we now retrieve the requested widget on GET requests. Looking at the view, we can see additional metadata describing the expected route values using the @page directive. On the Edit page, we need our client to provide an identifier in the URI path.
@page "{id:int}"
@model RazorPagesMigration.Pages.Widgets.Edit
<h2>Edit</h2>
<form method="post" asp-page="edit" asp-route-id="@Model.Id">
    <label asp-for="Name"></label>
    <input asp-for="Name" />
    <span asp-validation-for="Name"></span>
    <button type="submit">Save Widget</button>
</form>
For Rider and ReSharper users, we can navigate between the Razor views and our page model utilizing the Navigate to action (check docs for shortcuts). When switching between the contexts of UI and the backend, using the Related Files action makes it even faster to switch between parts of our Razor page.
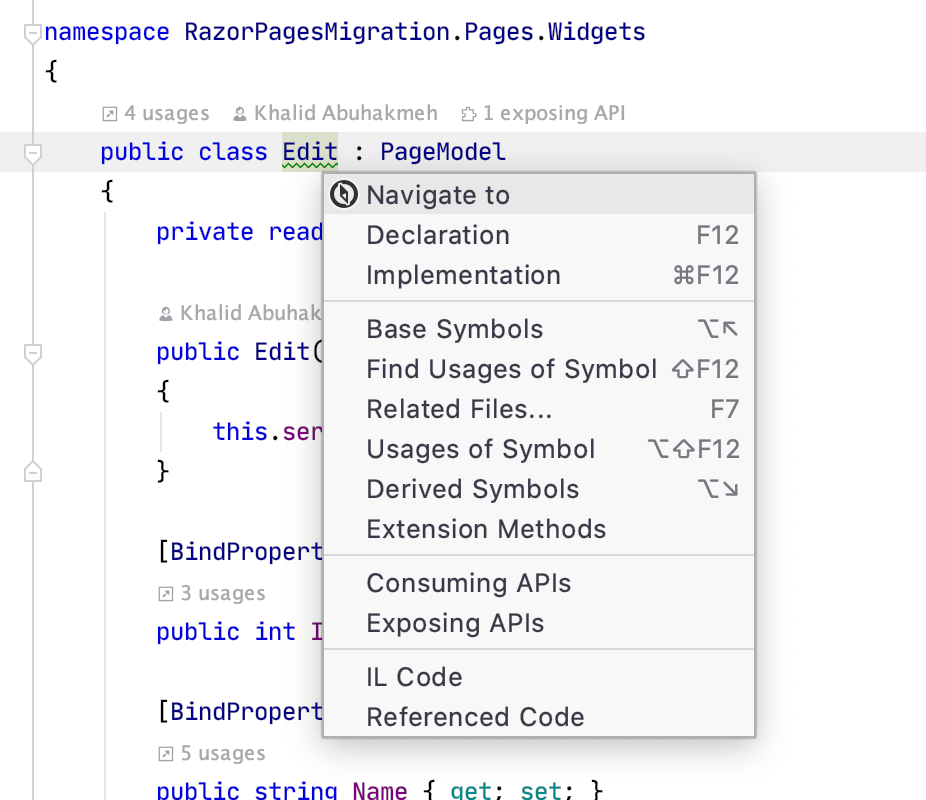
Like the IDE features for ASP.NET MVC, we have the ability to refactor names for properties found on our page models. We can also navigate from Razor directly to our C# implementations by Cmd/Ctrl+Click our model properties.
Sharing Is Caring
Looking through the example project, it is clear that both Razor Pages and MVC share the same foundation. The request pipeline for Razor Pages is almost identical to MVC, utilizing constructs like validation, action results, razor views, and more. In our sample, we also use the same layout our MVC views use. The realization brings us to an important point: Razor Pages and MVC are not mutually exclusive. They complement each other very nicely. The shared codebase allows us to migrate parts of our applications gradually, and with calculated precision.
When Not To Use Razor Pages
As mentioned previously, a Razor Page’s ability to handle HTTP methods is minimal. The lack of comprehensive HTTP method support makes it a difficult platform to build APIs. If our frontend exclusively works with JavaScript and frontend model binding, then we would see more benefit sticking with ASP.NET MVC. That’s not to say it is impossible, but it would be painful.
The complexity of our UI can play a role in choosing MVC over Razor Pages. Our choice to use Razor Pages depends on the standard building block of our UI. The Razor Pages build block is the PageModel, but with MVC, we can create smaller components. For example, a newsletter sign-up form might be visible across an entire web application. An MVC endpoint might be better suited to handle requests for newsletter signup.
The default conventional routing system that Razor Pages uses is also very limiting. If we want deeply nested route paths, we could see our solution structure explode with complexity. There are ways to mitigate this problem using Razor Pages conventions, but most folks should steer clear of changing the standard behaviors.
Conclusion
Razor Pages and ASP.NET MVC share a foundation that makes the use of both technologies in one project highly synergetic. Most developers can and should use both in their applications. We should also consider some existing MVC infrastructure and whether certain parts of our solutions would make sense to migrate to Razor Pages. HTML focused pages are ideal for a Razor Pages refactor, and as shown in this post, we can reuse many of the same elements from MVC.
Folks building JavaScript-heavy frontends or API backends should continue to use the MVC pattern, as it affords them the most flexibility in terms of HTTP methods, routing, and response handling.
Ultimately, the choice between Razor Pages and MVC is personal, and as shown in this post, both share much of the same infrastructure. Looking at the example project provided, we can see we can achieve feature parity no matter what path we take. The Razor Pages approach reduces much of the ceremony around using the MVC pattern, and it is worth considering for any current ASP.NET developers.
For those who are interested in learning more about Razor Pages, I highly recommend LearnRazorPages.com as a high-quality reference for beginners and experienced developers.


