YouTrack
Powerful project management for all your teams
Discovering YouTrack: Time Tracking

Time tracking is vitally important for productivity, but there is no single time tracking method that works perfectly for everyone. Some prefer to have their time tracked automatically, others want to manually record their time entries, and there are even people who need to create reports from time tracking data and analyze them.
The good news is that YouTrack can help you maintain accurate timekeeping records no matter which approach you and your team prefer.
And we have even more good news. The next major update of YouTrack, coming this summer, will further expand the time tracking functionality. The brand new Timesheets will provide you with multiple opportunities to view and update work items for yourself and other users on a calendar view and use a collection of interactive timesheets for specific projects.
Read on to learn more about the essentials of tracking and reporting time with YouTrack, and find out about some brand new integrations that add a whole bunch of extra time tracking options.
YouTrack time tracking essentials
YouTrack’s approach to time tracking is organized around three main categories: estimation, spent time, and work items.
- The Estimation field is the simplest, as you just need to enter the time you expect it will take to complete a task.
- A work item is an entry that defines a piece of work done on a task. It has an author, date, duration, type of work, and an optional comment. For example, a work item can describe 4 hours of development that you did today. Work items are added to issues, and one issue can have many work items with different authors, types, and durations.
- An issue’s Spent time field contains the sum of the durations of all work items logged for that issue.
The estimations and spent times for subtasks are aggregated in their parent tasks for your convenience, making it easy to track progress on user stories and epics.
Getting started
The first step you need to take is to configure time tracking on your project settings page. You should enable time tracking and confirm the fields you will use to store the estimation and spent time values.
Once you’ve done that, you can use YouTrack commands or the Add spent time button to add work items with durations to issues in your project.
Built-in automatic timers
What if you don’t want to click a button each time you need to record spent time? What if you forgot to log the time you spent working on a task? Automation is the answer. We’ve prepared two workflows for you to track your time automatically – one that starts the timer when you move your issue to the In Progress state, and another one that starts the timer when you explicitly set the Timer field to Start.
When you move your issue to the Fixed state, or when you manually stop the timer, a work item will be added to the corresponding issue automatically.
To enable a workflow, you should attach it to a project.
Pomodoro timers
With the Pomodoro approach, you work in small intervals of time (usually about 25 minutes), being fully involved in your tasks during these intervals with no distractions at all.
The PomoDone application developed by PomoDoneApp provides you with a configurable Pomodoro timer that tracks these intervals automatically with minimal manual intervention. You just set the duration of your intervals, export your YouTrack issues to PomoDone, and start working on your tasks.
PomoDone will automatically create work items in your YouTrack issues according to tracked intervals and remind you about breaks and upcoming intervals – all you have to do is work on your tasks.
The built-in YouTrack Pomodoro workflow is also designed to help you concentrate on your tasks and not go bananas (only tomatoes!). Simply attach the workflow to your projects and apply suggested changes – YouTrack will add the required fields to your projects automatically.
Track it all
If you are a fan of logging all your activities throughout the day, take a look at the timeBro desktop application. timeBro will log all your computer activities and record your time spent in messengers, browsers, offline time, and, of course, YouTrack. These timed sessions are then displayed in a timeline where you can attribute them to different tasks, so you can be sure your billable time is always accounted for. At the same time, all YouTrack-related spent time will be recorded in the corresponding issues, so you will be able to generate accurate time reports afterwards.
Time reports
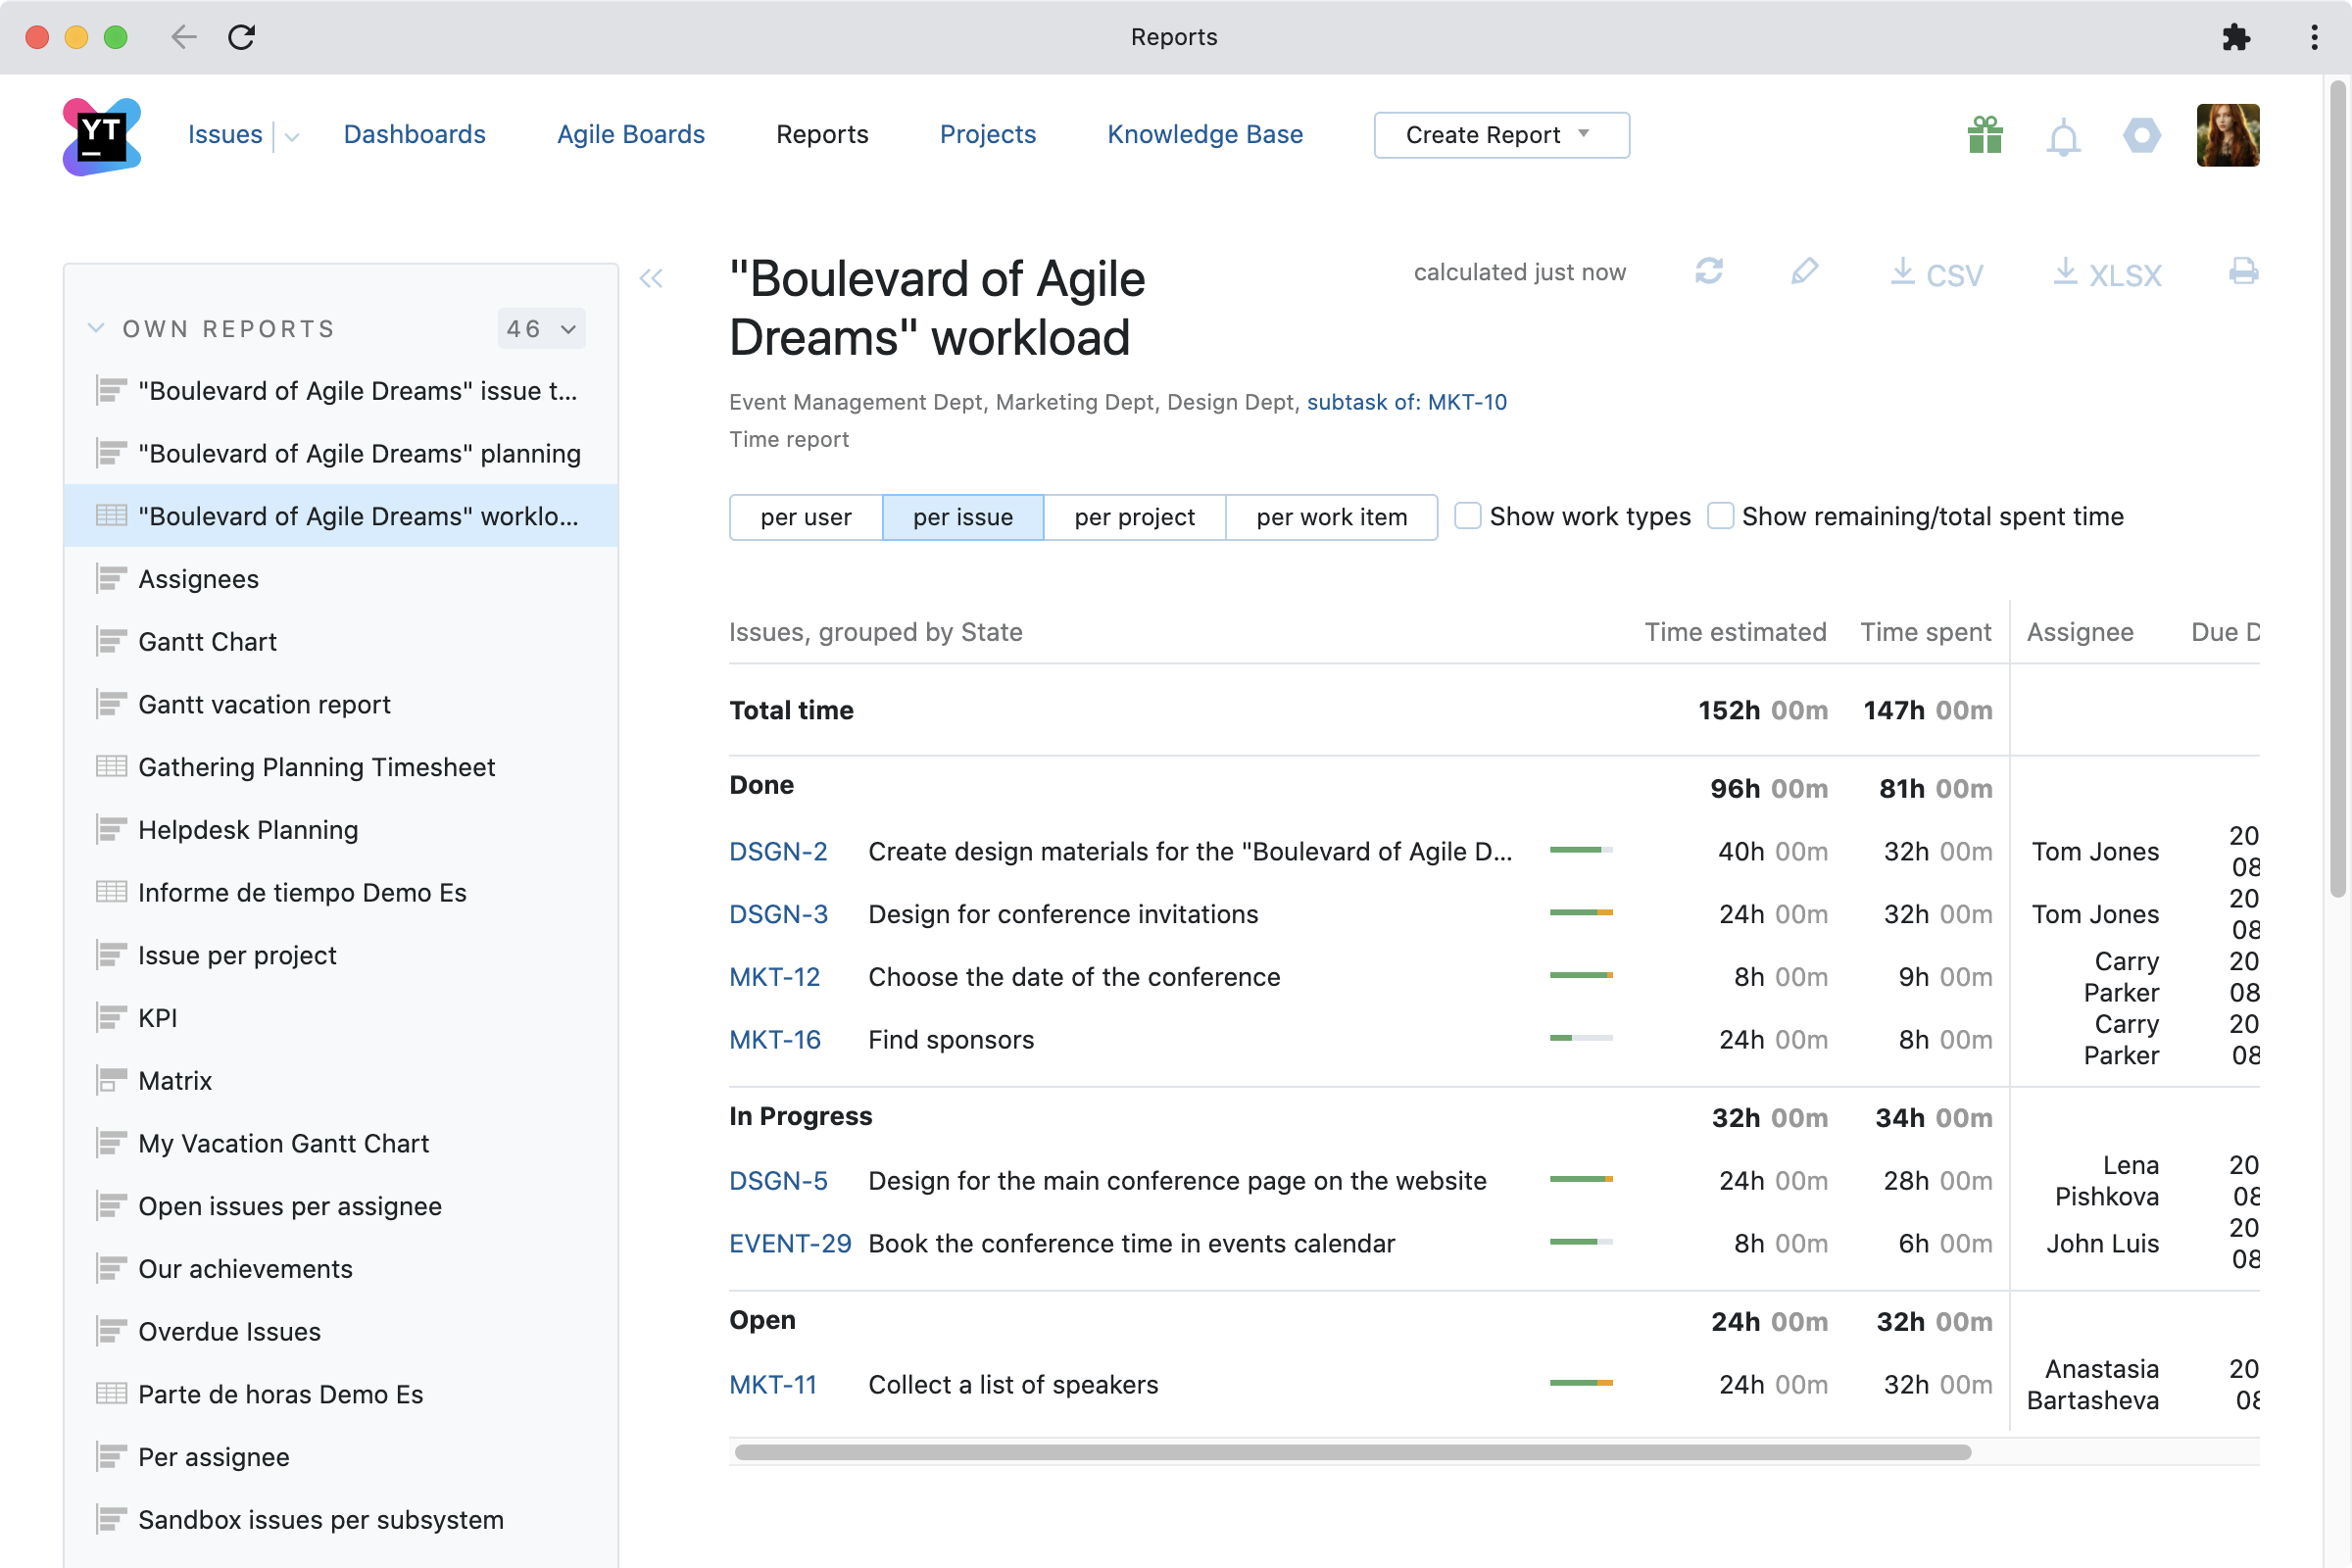
Time reports allow you to combine all recorded time entries on one page, filter them as you need, and get a big-picture view of how time is spent on tasks in projects. You can use various data views – per issue, per project, per user, or per work item – for different purposes, for example, to check whether anyone in your team was overloaded during the latest release, or whether a user story took way more time than you had planned.
Time reports can be exported to CSV or Excel for further analysis and calculation, and they can be added to YouTrack dashboards to keep your time statistics close at hand.
Never leave your code: get the YouTrack plugin for IntelliJ-based IDEs
Don’t lose time and focus switching between YouTrack and your JetBrains IDE. The YouTrack plugin for IntelliJ-based IDEs is easy to set up and displays a list of your tasks right inside your IDE.
The plugin can display a list of issues, such as your personal backlog, a list of tasks for the upcoming release, or your technical debt – whatever you need to keep track of. You can customize this list at any time to have the most relevant issues at hand and update them from the IDE, adding comments, applying commands, or changing statuses to let your teammates know about your progress. The plugin will also deliver notifications about updates in your issues to your IDE, so you can keep track of the latest developments.
You can also quickly and easily create bug reports in YouTrack with just a couple of clicks in your IDE.
The plugin supports several time tracking modes. There is automatic tracking, where the plugin tracks your IDE activity and uploads time logs at preset intervals, after you commit your changes, or when you close the IDE project. There is also manual tracking, where you manually start and stop the timer, and post your time tracking data to YouTrack.
You can learn more about the plugin in this post.
We hope that these tips will help you configure the time tracking process that best suits your team’s needs. We’d love to hear your ideas and opinions! Is there anything you’d like to add or improve in YouTrack’s time tracking functionality?
Please share your thoughts with us in the comments below or submit a direct support request. Meanwhile, we are preparing a big new Timesheets functionality update with the next major YouTrack release this summer. This will provide separate, interactive timesheets pages that will allow you to keep track of all the time you’ve spent on your projects in one place, so stay tuned!
Update: Since this was originally published, we have released Timesheets in YouTrack 2021.3. Please read this blog post to learn more.
Your YouTrack team